Wallpapering can seem daunting, but with the right know-how, it’s an achievable endeavor that can dramatically change the look and feel of your space. One of the biggest challenges, and the key to a professional finish, is mastering wallpaper pattern matching. This isn’t just about sticking paper on a wall; it’s about creating a visually harmonious surface where patterns flow seamlessly, giving the illusion of a continuous design. This guide is your comprehensive resource for understanding and conquering the art of pattern matching, arming you with the knowledge and techniques to achieve stunning results. We’ll delve into everything from identifying different pattern types to employing practical tips for minimizing waste and maximising your wall’s appeal. Let’s get started.
Imagine a beautiful floral wallpaper. Now, picture those flowers abruptly chopped off at the seams, creating a jarring and unappealing visual. That’s the impact of poor pattern matching. Conversely, when patterns align perfectly, the wallpaper becomes a cohesive work of art, enhancing the overall aesthetic and creating a sense of sophistication. Pattern matching is the process of aligning the design elements of wallpaper strips to create a continuous pattern across your wall. It’s the difference between a DIY project that looks, well, DIY, and a professionally finished space that’s sure to impress. Properly matching patterns not only enhances the visual appeal but also shows attention to detail and a commitment to craftsmanship. This guide will help you achieve that professional finish, even if you’re a beginner.
Understanding Wallpaper Pattern Types: Your First Step to Success
Before you even think about hanging wallpaper, you need to understand the different pattern types. This impacts how you’ll measure, cut, and match your rolls. Here’s a rundown:
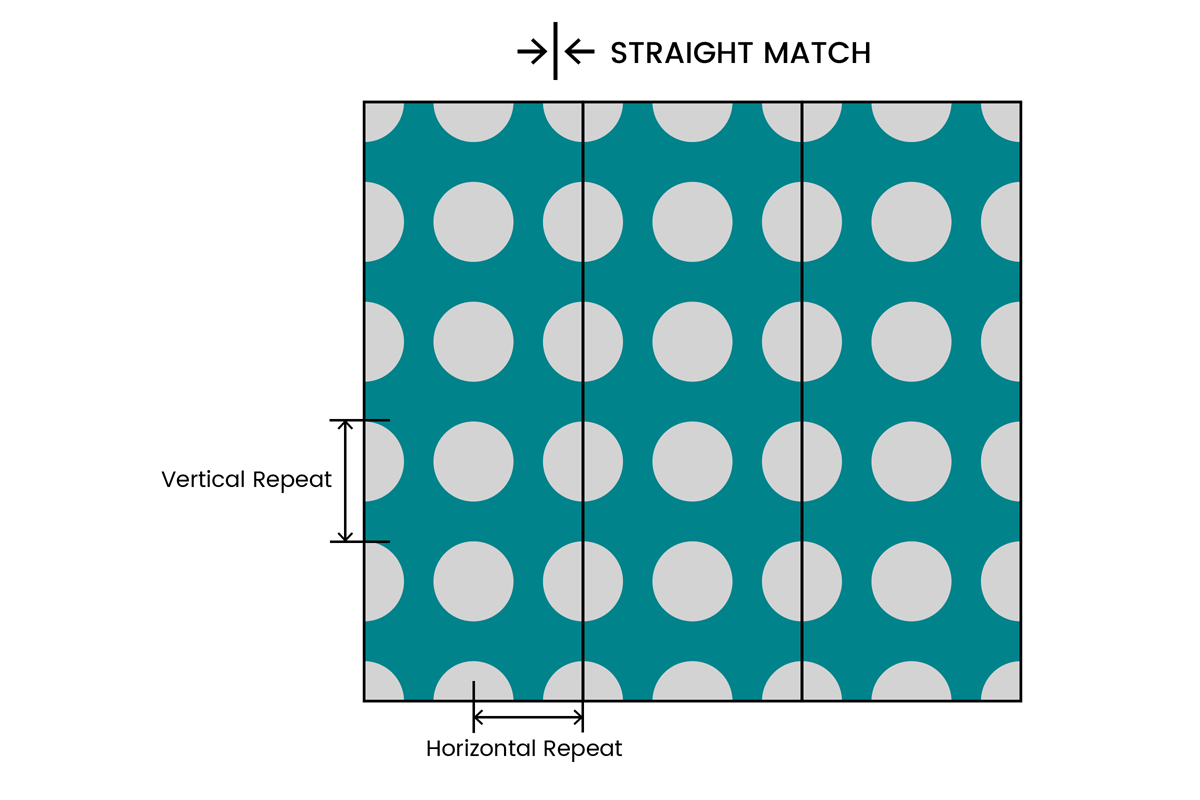
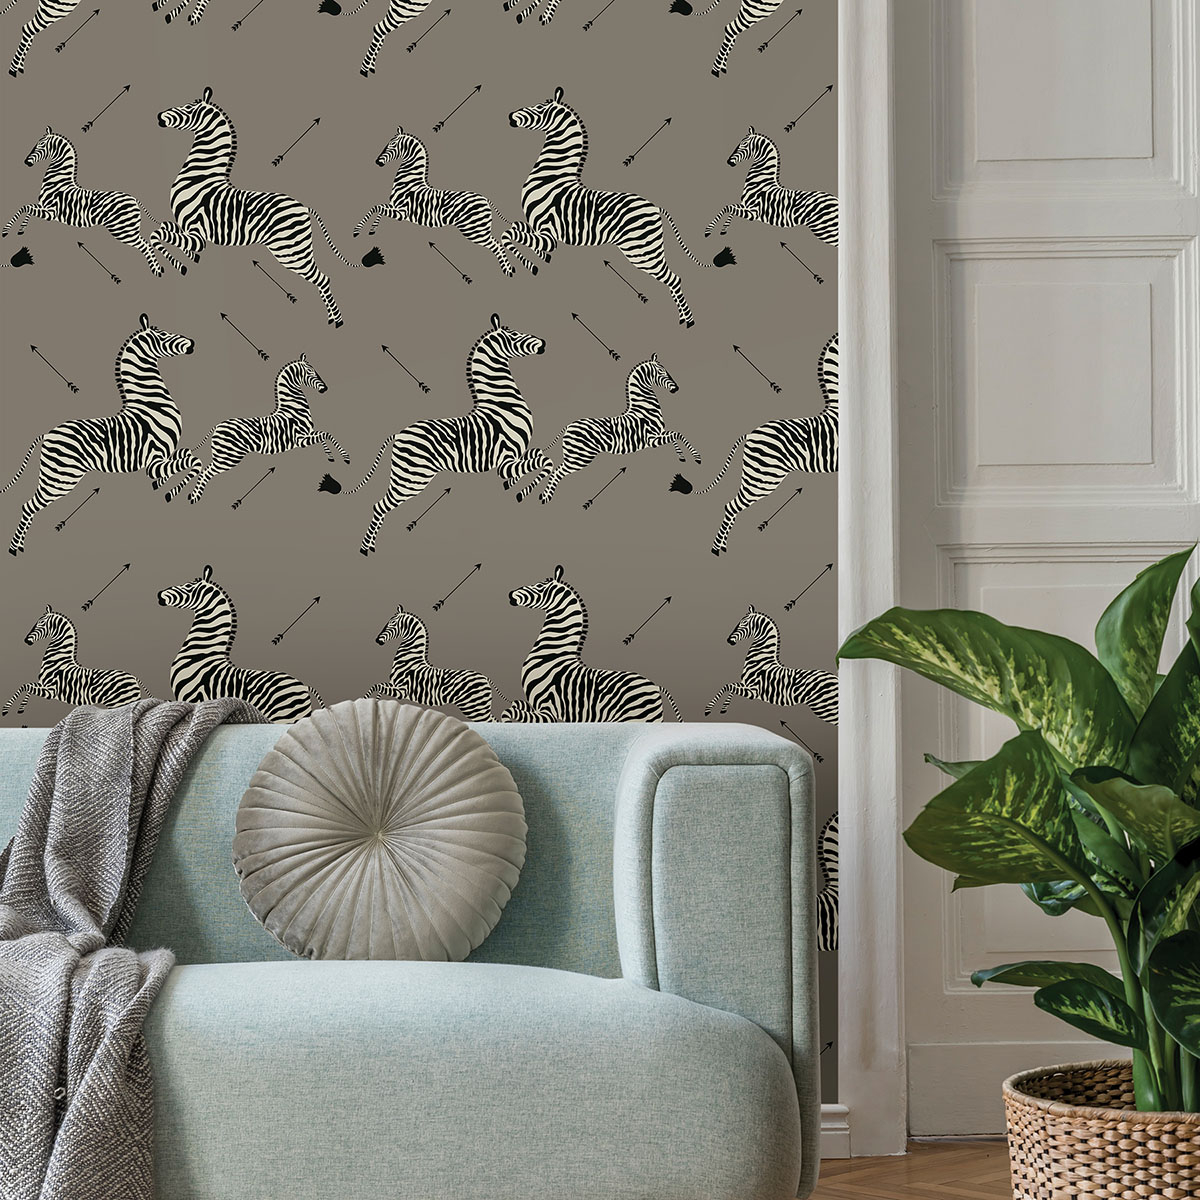
- Straight Match: The easiest to work with. The pattern repeats horizontally across the roll, and you simply align the pattern at the same point on each strip. You’ll cut each strip the same length.
- Offset Match: The pattern shifts horizontally on each strip. The repeat is often specified as a percentage of the pattern’s width (e.g., a 50% offset means you shift the pattern by half of its width on each adjacent strip). You’ll need to alternate strips, cutting one to match the top, the next to match the bottom, and so forth.
- Drop Match: The pattern drops down vertically on each strip, as well as shifting horizontally. This is the most challenging to match and often requires more waste. You’ll have to calculate the pattern repeat and offset to ensure the design aligns correctly. You’ll again alternate strips.
- Free Match: This is the most forgiving type. There’s no specific pattern match, so you can hang the strips in any order. This is great for textured or non-patterned wallpapers.
Pro Tip: Always check the wallpaper’s label or instructions for the pattern type and repeat measurement before you start. This information is crucial for accurate matching.
Taking Accurate Measurements and Planning Your Project: Avoiding Waste and Frustration
Proper preparation is half the battle. Accurate measurements and a well-thought-out plan will prevent wasted paper and save you time and frustration. Here’s how to do it:
- Measure Your Walls: Measure the height and width of each wall you plan to wallpaper. Don’t forget to account for windows, doors, and any other obstructions.
- Calculate Wallpaper Needed: Use a wallpaper calculator (many are available online) or calculate it yourself. Consider the pattern repeat when determining how many rolls you’ll need. Add extra rolls for waste, it’s always better to have too much than not enough.
- Inspect Your Rolls: Before starting, inspect each roll for dye lot consistency. This ensures that all the rolls match in color. Check for any defects. Also, check the pattern on each roll to make sure it’s consistent.
- Plan Your Layout: Consider where you want the pattern to start. It’s often best to center the pattern on the most visible wall. This will help you manage the pattern matching and reduce waste. Make sure you understand the pattern repeat – how many inches or centimeters it takes for the pattern to fully repeat itself.
- Cut Your Strips: Cut your first strip, allowing extra length at the top and bottom for trimming. Then, use this strip as a guide for cutting subsequent strips, accounting for the pattern match. For offset or drop matches, you’ll need to consider the offset in your cutting plan.
The Dry-Hang Method: A Technique for Precise Pattern Matching
The dry-hang method is a valuable technique for matching patterns precisely, particularly with offset or drop matches. Here’s how it works:
- Dry-Fit the First Strip: Apply the first strip of wallpaper dry (without paste) to the wall, aligning it with your starting point. This allows you to visualize the pattern and make initial adjustments.
- Match the Next Strip: Hold the next strip up to the first, aligning the pattern at the top. Slide the second strip up or down until the pattern matches perfectly. Make sure the strips are vertical by checking with a level.
- Mark and Cut: Once you’ve found the perfect match, mark the point where the pattern aligns. Then, cut the second strip, adding extra length at the top and bottom for trimming. Remember that you should cut the wallpaper on a flat surface, not on the wall.
- Paste and Hang: Paste the back of the second strip and hang it on the wall, aligning the pattern with the first strip. Use a smoothing tool to remove any air bubbles.
- Repeat: Continue this process for each subsequent strip, dry-fitting, matching, marking, cutting, pasting, and hanging.
Dealing with Corners, Windows, and Doors: Navigating Obstacles with Ease
Corners, windows, and doors present unique challenges, but with careful planning, you can achieve seamless pattern matching around these obstacles.
- Corners: Measure the distance from the last full strip of wallpaper to the corner. Cut a piece of wallpaper that’s slightly wider than this measurement. Wrap the wallpaper around the corner, making sure the pattern aligns. Trim any excess.
- Windows and Doors: Measure the area around the window or door. Cut a piece of wallpaper that’s slightly larger than the opening. Hang the wallpaper over the opening, ensuring the pattern aligns. Then, carefully trim away the excess paper around the edges of the window or door frame, using a sharp utility knife.
- Electrical Outlets and Switches: Turn off the power to the outlet or switch. Apply the wallpaper over the outlet or switch, making sure the pattern aligns. Then, carefully cut around the opening with a sharp utility knife. Reattach the cover plate after the wallpaper is dry.
Tools of the Trade: Essential Equipment for Wallpaper Success
Having the right tools makes all the difference. Here’s a list of essential equipment:
- Measuring Tape: For accurate measurements.
- Level: To ensure your wallpaper strips are hung straight.
- Pencil: For marking.
- Wallpaper Smoothing Tool: To remove air bubbles and smooth the paper onto the wall.
- Utility Knife or Sharp Scissors: For trimming.
- Wallpaper Paste: Choose the right type for your wallpaper.
- Paste Brush or Roller: For applying the paste.
- Seam Roller: To secure the seams and prevent them from lifting.
- Plumb Bob (Optional): To create a perfectly vertical line for your first strip.
- Wallpaper Stripping Solution (Optional): For removing old wallpaper, if needed.
- A good work surface: A table or floor covered with a drop cloth is great to work with.
Troubleshooting Common Problems: Solutions for a Smooth Finish
Even experienced wallpaperers encounter issues. Here are solutions to some common problems:
- Seams Peeling: Ensure the seams are properly pasted and smoothed. Use a seam roller to secure them. If necessary, apply a small amount of wallpaper seam adhesive.
- Air Bubbles: Use a smoothing tool to remove air bubbles immediately after hanging the wallpaper. For stubborn bubbles, prick them with a pin and smooth the area.
- Pattern Mismatch: Double-check your measurements and pattern repeat. Make sure you’re using the correct pattern matching technique for your wallpaper type. If you’re off, you might need to adjust the position of your strips.
- Wallpaper Tears: Handle the wallpaper gently. If a tear occurs, try to carefully patch it with a piece of matching wallpaper, matching the pattern as closely as possible. Consider using a small amount of wallpaper adhesive to secure the patch.
- Paste Bleed-Through: If the paste bleeds through the wallpaper, wipe it away immediately with a clean, damp sponge. Ensure you’re using the correct type of paste for your wallpaper.
Mastering wallpaper pattern matching is a rewarding skill that transforms any room. By understanding pattern types, planning your project carefully, and employing the right techniques, you can achieve professional-looking results. Remember to take your time, be patient, and don’t be afraid to make mistakes – they’re part of the learning process. With the knowledge and tips provided in this guide, you’re now equipped to create walls that are not only perfectly aligned but also a true reflection of your personal style. So go ahead, pick out that perfect wallpaper, and enjoy the process of creating a space that’s both beautiful and uniquely yours. Good luck, and happy wallpapering.
[sps_html tag=”img” src=”https://cdn.theartssection.com/wp-content/uploads/2025/06/mixing-and-matching-fabric-and-wallpaper-patterns-decorating-basics-throughout.jpg” alt=”Mixing And Matching Fabric And Wallpaper Patterns | Decorating Basics … throughout” style=”width: 100%; height: auto;”]
[sps_html tag=”img” src=”https://cdn.theartssection.com/wp-content/uploads/2025/06/10000-wallpaper-pattern-matching-pictures-inside-the-art-of-wallpaper-pattern-matching-a-comprehensive-overview.jpg” alt=”10,000+ Wallpaper Pattern Matching Pictures inside The Art of Wallpaper Pattern Matching A Comprehensive Overview” style=”width: 100%; height: auto;”]
[sps_html tag=”img” src=”https://cdn.theartssection.com/wp-content/uploads/2025/06/pin-by-maqsood-akram-on-1-art-wallpaper-pattern-art-illustration-art-with-regard-to-the-art-of-wallpaper-pattern-matching-a-comprehensive-overview.jpg” alt=”Pin By Maqsood Akram On 1 | Art Wallpaper, Pattern Art, Illustration Art with regard to The Art of Wallpaper Pattern Matching A Comprehensive Overview” style=”width: 100%; height: auto;”]
[sps_html tag=”img” src=”https://cdn.theartssection.com/wp-content/uploads/2025/06/premium-photo-3d-seamless-ceramic-wall-tiles-design-texture-wallpaper-pertaining-to-the-art-of-wallpaper-pattern-matching-a-comprehensive-overview.jpg” alt=”Premium Photo | 3D Seamless Ceramic Wall Tiles Design Texture Wallpaper … pertaining to The Art of Wallpaper Pattern Matching A Comprehensive Overview” style=”width: 100%; height: auto;”]
[sps_html tag=”img” src=”https://cdn.theartssection.com/wp-content/uploads/2025/06/page-2-wallpaper-pattern-matching-psd-high-quality-free-psd-with-regard-to.jpg” alt=”Page 2 | Wallpaper Pattern Matching Psd, High Quality Free Psd … with regard to” style=”width: 100%; height: auto;”]